
Back in the Spring of this year I, along with a few other talented photographers in our area, was asked by the Martin Hospital if I would like to hang some of my newborn work in one of their hallways. I was so honored to be asked, and of course, said I would love to. While I was deciding on sizes for the display, the pictures, the color scheme, and finish, I thought this would be a great way to illustrate how to put together a display for your home! So below I’ve got a few steps you can take when making these decisions for your own walls.
Size it up
The first step is deciding how big your whole display needs to be. For the hospital project, I actually sent over a few sketches to them ahead of time to see how much space they’d like my images to fill. That gave me the information I needed to know how big the actual prints needed to be. This is a technical step, but important! :) Get out a tape measure and even mark the measurements with some painters tape if you’d like to visualize what you need on your wall.
*Chances are, you’re going to need a bigger display than what you think. Most people guess their space is smaller than it actually is!

2. Decide Your Wall Hanging Style
The next thing to consider when putting together a wall display is your wall display style. Didn’t know you had one? :) Here’s what I mean— Do you prefer many, smaller pictures, or fewer, larger pictures?
Typically, if you are one to like a more structured look, clean lines, and simple finishes, you’ll choose say, four large prints, rather than nine smaller prints. If you have more of an eclectic style and like mixing and matching finishes, sizes, and gravitate towards circles rather than squares, I’d say you’ll be happier with many, smaller pictures. (I’m totally a larger+fewer picture girl!)

3. Map it out
Once you have the size of the display in mind and how many images you’d like to incorporate, start mapping out the pictures on a piece of graph paper, keeping everything to scale as much as possible. Don’t be afraid to think outside of a box shape— some spaces look great with a more diamond layout, or even a circle. This will also give you a better visual for how big to print each image.
*If you plan to frame any or all the pieces, make sure you take the frame size into account, and not just the prints themselves! Also, be sure to leave room for space between each picture. An inch or two in between is a good start.

(Here’s my original sketch of the wall display I created for the hospital— my digital version of graph paper ha!)
4. Choose your color scheme
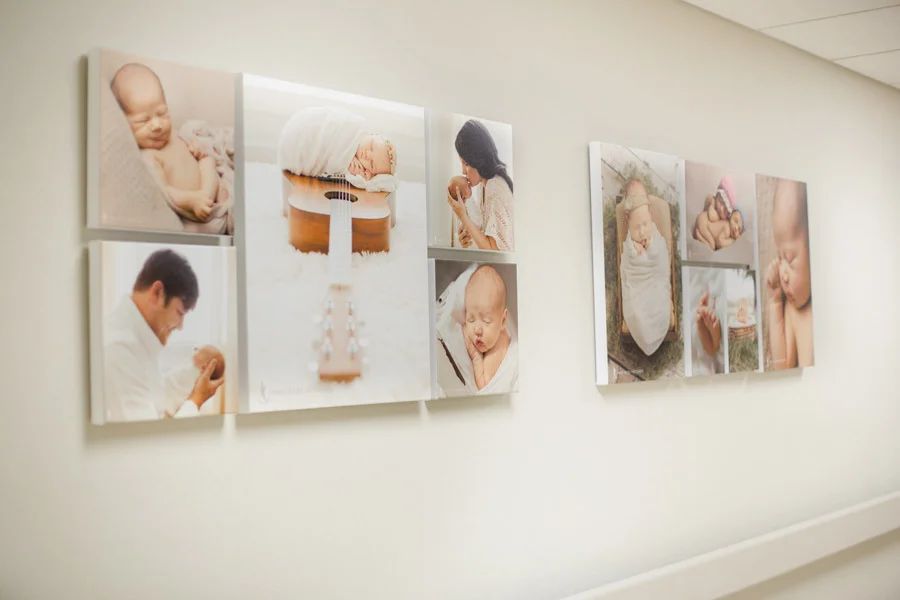
For the hospital display, I wanted the images to be as timeless as possible and go with a variety of decor, so I chose to keep all the colors very neutral. Though they came from several different sessions, the display looks cohesive because the tones match from one image to another.
For your home, take into consideration the colors in the walls and decorations around the display. Also, if you would like to add on to the display later, or if the pictures you’re choosing from are from different sessions and stages, think about limiting it to a similar color scheme across the display. If the colors are a bit busy or seem to clash, another great option is to turn all the images black and white! That will make the display even more timeless.

5. Choose your finish
If you want a finish you don’t have to frame, there are so many options— from wooden prints, to canvases, to thin wraps and metal. Even if you do want to frame them, choosing the finish for the frame can be tough! Here, I would choose between rustic and clean, between texture or smooth. If you like something clean but with a little texture, a canvas would be a great option! If you like a more rustic look, wooden prints are beautiful and add a bit of rustic warmth to a space. See what other finishes you have around that space and gain inspiration from those. Don’t be afraid to mix and match finishes, if you tend to be drawn to a more eclectic look!

Now that you’ve made all these little decisions, the last thing to do is pick out the pictures, print them, and hang them! I know it seems like such a big task, but I promise it is so rewarding to see your family’s sweet faces on your wall every day. Pour a cup of coffee, grab a notebook, and just start putting some shapes down on paper. Have fun with it! You can always switch things up later if needed!
If this post was helpful to you, I’d love to see what you create from it! Once your display is up, take a picture and feel free to tag me on Instagram @AbreaCrackelPhoto. :)