

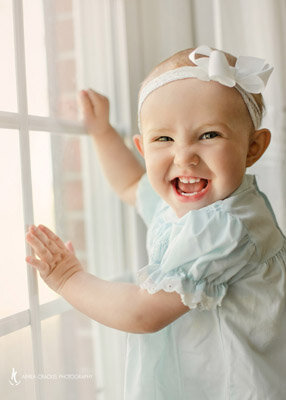
When we first found out I was pregnant, I took to Pinterest for lots of baby-related searches, such as nursery inspiration and registry check lists, and even quotes on motherhood if I was feeling extra sentimental. In between all the advice and how to’s and sweet sayings, I found and pinned some precious pictures that I loved and wanted to remember for when our little one arrives. From simple photos to show off those tiny baby details, to milestone pictures that document how much they change from month-to-month, I happily went down that adorable rabbit hole of baby photos and hugged my little baby bump in a tad closer.
While I was looking through hundreds of photos and saving the ones I loved most, I started thinking of all the moms who have probably done the same thing I was doing, though without knowing exactly how to achieve the look of these inspiration photos on their own. Most of the photos were simple and just captured everyday life, not something that required a professional photo shoot and expensive gear (though of course I believe there is definitely a time and place for those things! 😉) So I thought I would share a few tips for moms and dads who wanted to capture those sweet memories of everyday life, keeping in mind that most of these parents will be using just a smartphone and have no photography education, or at least very little. If that’s you, I hope you’ll read on and find some helpful tips here!
*A quick note— these photos (besides the screenshot of my phone) were all shot with my DSLR for my clients, so they did involve a professional camera and retouching. Since our baby boy isn’t here yet, I haven’t taken many indoor photos of little ones on my phone, so I couldn’t use non-professional photos as examples. :) The tips I’ve shared here, though, can be applied whether you are using a real camera or a smartphone!

Safety Safety Safety
I’m starting with safety first because obviously it is the most important thing to keep in mind as you photograph your sweet kiddos. I’ve unfortunately seen a few photos on social media of babies who are put in questionable positions or with unsafe props, without the picture-taker knowing the risks involved. (A lot of the professional photos you see of babies in props are either cropping out an assistant who is inches away, or baby actually did have a spotter’s hand on them at all times and it was photoshopped out.) Here are a few things to look out for—
First, if baby is put inside anything such as a basket, make sure their head is supported well, especially if they are very new to the world. Have someone else sit close enough to baby that if your little one were to startle or push with their legs, they won’t be going anywhere. (Yes, even for babies who are days old! They are stronger than you think!) Same goes for pictures of babies on changing tables, on beds, etc. It’s easy to assume that because they haven’t rolled over yet they’re fine, but trust me, it is much better to be safe than sorry!
Second, please do not give little ones things like glowing Christmas lights that they can grab and chew on, etc. I know the photos can be sweet, but goodness, this makes me so nervous around the holidays when I see those pictures! Maybe just include some lights just out of their reach or a few feet away in the background, where you’ll get more of that bokeh we all know and love. :)Finally, as much as I am a dog person, always use a helper if you are taking photos of your baby snuggled in with the family pet. I’m sure we’ll be taking lots of photos of our baby boy with our fur babies, so I’m definitely not saying don’t include them in photos together, but just keep in mind that animals are unpredictable even if they are super lovable. Having a helper close by to keep an eye or even a hand on baby when they are next to your pet will be much safer if the pet happens to get up suddenly and doesn’t watch where they step, etc.

An example of a before-and-after edit, where I removed the dad’s hand from the picture. It was offering support for baby’s head, while also staying close enough to keep baby protected in case he flinched out of that pose.
2. Lighting
My biggest tip for simple lighting is to use natural sunlight whenever possible. In my house we are blessed with many windows, which is one of my favorite things about it! When using natural light from outside, try to turn off any other lights in the room, because if they are a typical light bulb, they’ll cast a yellowish glow onto the face(s) in the picture. You can use sheer white curtains to shield some of the sunlight if it is a bit too harsh, or just close the blinds a bit if needed.
In our apartment we had when we were first married, we had a total of four windows in the whole space, so I understand not having the luxury of a naturally bright home. For those of you who have darker homes or rooms, if possible, for any pictures you can plan to take, try to take them on sunny days and at the time of day the light is coming into your home or into the specific room you’d like to use. And just know that you probably need less light to take the photos than you think. Maybe play with moving your little ones closer to the windows if possible, and just turning their faces more towards the light rather than away from it. These small tweaks can make a big difference!
If you need to use light from a lamp or ceiling pendant though, it’s definitely not the end of the world! :) You’ll probably just find that those pictures are a going to be a bit more orange, so if you use any apps for editing (Afterlight is my favorite!) just take the temperature slider a bit more towards the cool side if needed.
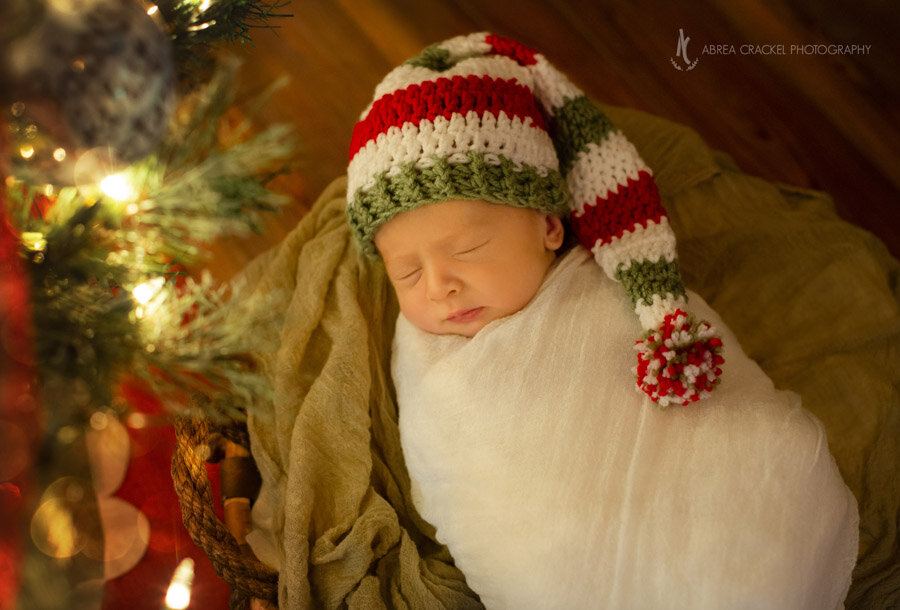
Little Merritt was lit by just the Christmas tree lights in this photo! Sometimes the orange glow from artificial lighting actually makes the picture better. :) (I did block the window light from shining on him in this picture, I didn’t want that cool light from outside to mix with the warm light by the tree and give me funky colors and shadows!)
*One thing to avoid with lighting is not to have the light coming from your little one’s chin and shining up. This is sometimes called campfire lighting or ghoul lighting— think of telling ghost stories and shining a flashlight up at your face from below. Not exactly flattering, right? :) Instead, try having the light mostly come from the side or from the top of their head.

See how the lighting looks better in the photo on the left? I had forgotten about this rule at first and set up the shot on the right, which is still sweet, but by simply flipping baby Sarah around so her head was closer to the window instead of her feet, it gave us much more even lighting on her face.
3. Adjusting Exposure
(I’m going to use the iPhone as the example on this one, because it is what I have used, but I’m sure other smartphones have a similar concept/feature!)
If you have ever tried taking a picture of your child sitting in front of a bright window and all you can get is a shadowy silhouette of them, this is a handy trick for you to know! If you are on an iPhone in the camera mode, try tapping your screen where your child’s face is, and it should brighten them up a bit. From there, if you need them to be a bit brighter or darker, when you tap your screen you should see a little yellow square with a sunshine next to it. If you drag the sunshine up or down, you’ll notice the image getting brighter or darker accordingly. Once it is just right, you can take the picture!

I used my dog Annie as my model in this one! Don’t judge her scruffiness— bath day is Saturday! haha

4. Angles
Something I have learned since I started taking pictures of newborns is not to shoot up their noses. :) If they are lying in their crib all sound asleep and cuddly, try taking pictures from their side, or a bit from the top to where their forehead is a little closer to you than their feet. Think of it almost like you would a selfie— you probably don’t take pictures of yourself from below your chin. Instead, you probably lift your camera/phone above your eyeline a bit. Not only will you not be seeing up their nose, you’ll get better pictures of their sweet tiny eyelashes, too!
For older kids, remember not to always shoot down on them. Try squatting or sitting to get right at their eyeline, too!
5. Newborn Smiles
A quick tip for capturing newborn smiles— if they are sound asleep and you start seeing them breathe a bit heavier or more rapidly, it may be a good time to get your camera ready! This is usually when they are dreaming, and they’ll start making a lot of different facial expressions, including smiling. I find this typically happens right after they fall asleep. (Sometimes this heavy breathing is also a good indication they are about to flinch due to their startle reflex, so they may fling out their arms and legs if they aren’t swaddled up. It’s perfectly normal for them to do this, just make sure they are safe and supported!)

I hope these tips were helpful for you! If you have any questions about taking pictures inside your home that I haven’t answered here, please let me know and I’ll do my best to help you out! :)